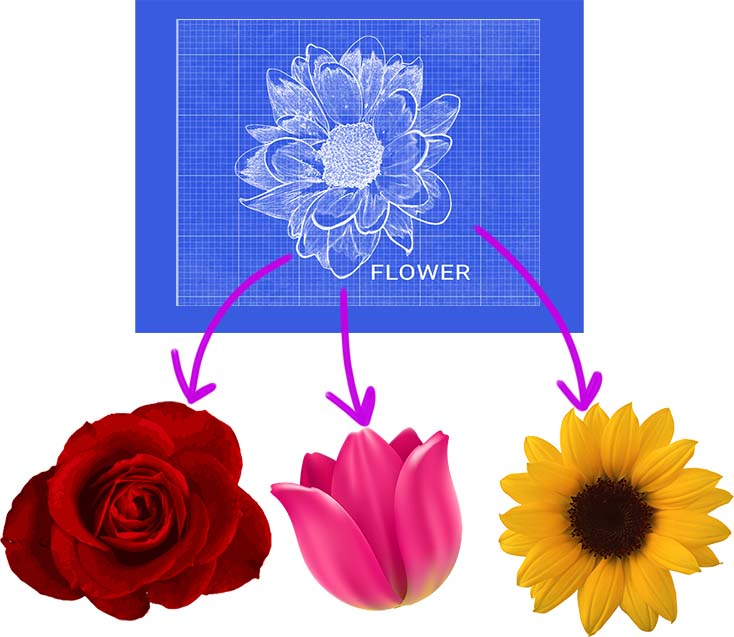
Object-Oriented Programming (OOP) uses classes as blueprints for objects within a program. For our program, we’ll create a garden that contains flowers(objects). We’ll start by creating a flower class that will serve as the blueprint for our flower objects. It will contain the attributes and methods that make each flower unique.
My Garden Application
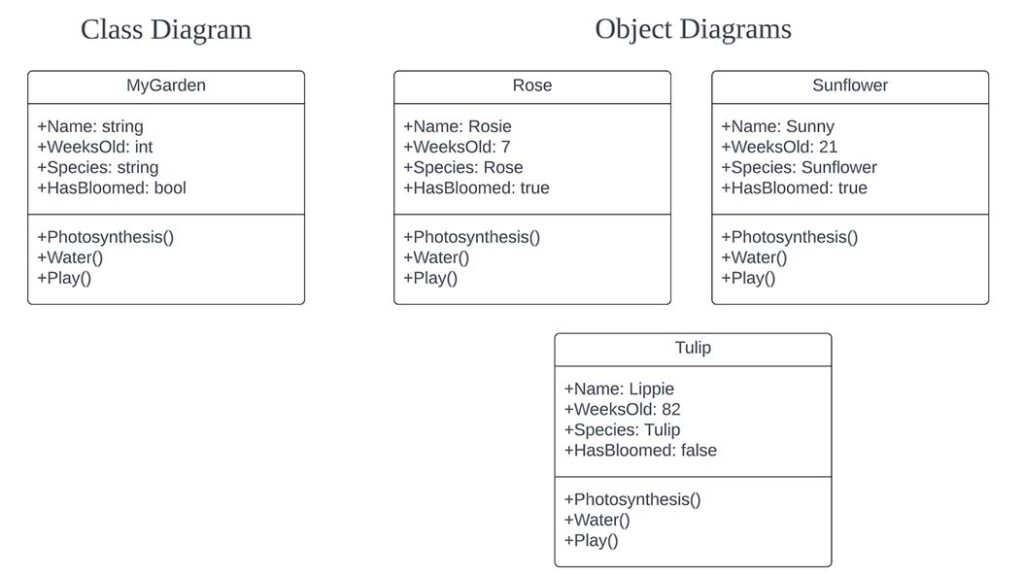
Let’s start by creating a blueprint of the flower in a UML Class Diagram. For our flower attributes, we will include its name, age in weeks, species, and if the flower has bloomed. The user can interact with the flower by adding methods like Photosynthesis, Water, Play, and Blooming.
UML Diagram

Once our blueprint is complete, we can create the various flower objects using a UML Object Diagram. An Object Diagram is similar to a Class Diagram, but Object Diagrams bring the objects to life by setting the variable equal to its desired data type. For example, Name: string in the Class Diagram is now Name: Rosie in the Object Diagram.
Startup Visual Studio
Let’s create a new Console App Project titled MyGardenApp, using Visual Studio, my current version is v17.5.3, and the .NET Framework in use is .NET 6.0.
We will use an ASCII Text NuGet Package ‘Figgle’ to display an introduction to our garden app. To install Figgle, click on Project > Manage NuGet Packages… and search for ‘Figgle’. Alternatively, we can copy the text from an ASCII Text Generator and paste it into a verbatim string. ‘FlowerPower’ is the ASCII text art theme for our program intro. Copy the following code from the Figgle Github to implement Figgle.
WriteLine(FiggleFonts.FlowerPower.Render("My Garden"));Next, let’s create a class that represents our blueprint class in our Class Diagram. It is essential to keep your code organized, so we will create a new file class titled Flowers You can use the shortcut Ctrl+Shift+A to add a new class or select Project > Add Class…
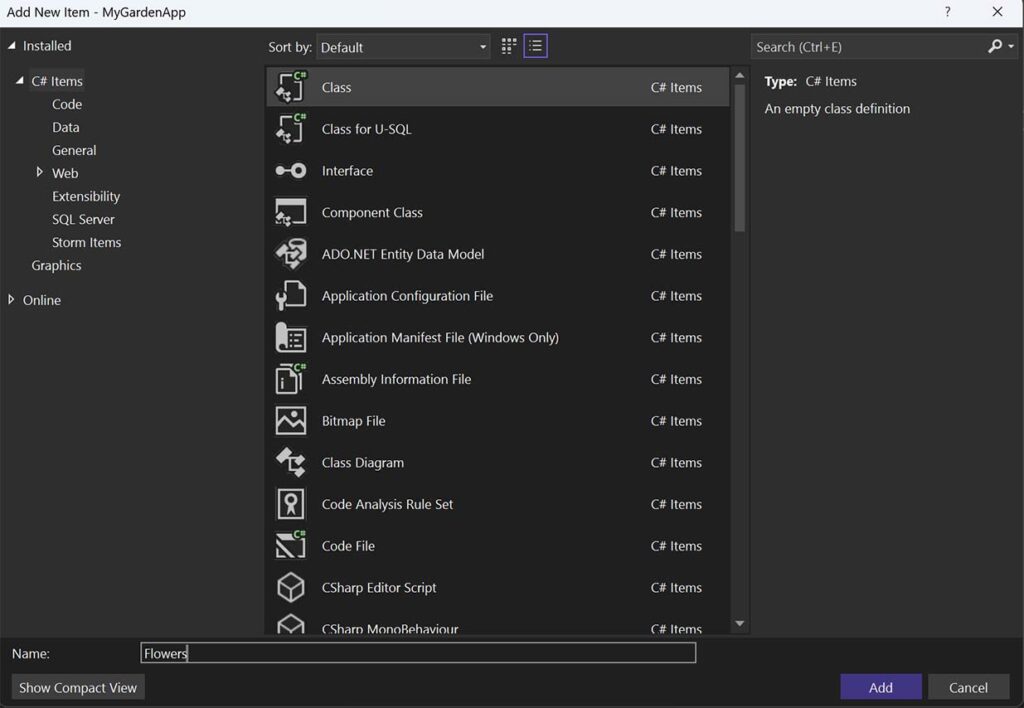
If you don’t see one on your screen, click View > Solution Explorer or use the shortcut Ctrl+Alt+L. Your Solution Explorer should now look like the image below.
Flowers.cs File

We will add attributes to our unique flowers so they can be identified. To do this, we will add the public fields from the Class Diagram to our Flowers class and create a constructor that includes them as parameters.
public Flowers(string flowerName, int flowerAge, string flowerSpecies, bool flowerBloomed)
        {
            Name = flowerName;
            WeeksOld = flowerAge;
            Species = flowerSpecies;
            HasBloomed = flowerBloomed;
        }
To demonstrate our attributes, create a Greet method that welcomes the user to the application and displays the attributes of any given flower. We should also add this method to both our class and object diagram to show the changes made.
public void Greet()
        {
            WriteLine($"My name is {Name} and I am a {Species}.");
            WriteLine($"I am {WeeksOld} weeks old.");
            WriteLine($"Has bloomed? {HasBloomed}");
        }
Now let’s head back into our MainClass file and make some flowers! We will make a new flower by creating a new class with the required parameters, i.e. flowerName, flowerAge, flowerSpecies, and flowerBloomed.
MyGarden rosieTheRose = new MyGarden("Rosie", 17, "Rose", true);With our new flower made, let’s greet the User. Write your new flower class, followed by a period, and attach the desired method (Greet()) to the end.
rosieTheRose.Greet();Run the program and you will get the output below.

We will use our class diagram to finish the program by adding the required methods.
public void Photosynthesis()
        {
            WriteLine($"{Name} is now absorbing the sun! YUMMM");
        }
public void Water()
        {
            WriteLine($"You give {Name} water. Ahh... refreshing.");
        }
public void Play()
        {
            WriteLine($"You throw a stick but {Name} doesn't fetch, odd.");
        }

public void Blooming()
        {
            HasBloomed = true;
            WriteLine($"{Name} is blooming! The BEAUTY!");
        }
Run the code and the output should be the same as below.

Now get some variety by adding more flowers. We will add flowers using the new Object Diagram we have created.
Add More Flowers!
If you did it correctly, it should look similar to the first flower rosieTheRose.
Flowers sunnyTheSunflower = new Flowers("Sunny", 21, "Sunflower", true);
WriteLine("");
WriteLine("> Flower 2");
sunnyTheSunflower.Greet();
sunnyTheSunflower.Water();
sunnyTheSunflower.Play();

Flowers tulieTheTulup = new Flowers("Tulie", 82, "Tulip", false);
WriteLine("");
WriteLine("> Flower 3");
tulieTheTulup.Greet();
tulieTheTulup.Water();
tulieTheTulup.Blooming();
Run it and start your garden!

Declutter Your Workspace
The last thing we need to do is clean up the clutter in the main class by creating one additional class titled MyGarden. Just like before, create a new class item in the Solution Explorer.
There is an extra step involved with this transfer, because we want all code within MyGarden to be ran as soon as the class is made. To have the code run when instantiated, we will place the Main Class code within a MyGarden constructor.
A tip for quickly creating constructors within a class is by typing ‘ctor’ and hitting tab.

Running the program would result in an empty output because there is nothing in the main class. To build our garden, we’ll have to instantiate a new class an new object named myGarden.

You have completed your MyGarden program! You can display flowers as you wish and add any methods you desire.
Conclusion
Creating a program from a Class Diagram is a valuable skill for any developer. UML Diagrams like the Class Diagram allow us to understand and edit complex programs efficiently, saving us time and resources. In this tutorial, we walked through the process of creating a garden program with flowers using a Class Diagram. We learned how to create a UML Class Diagram, how to use it to create our blueprint class and object classes, and how to add attributes and methods to our classes. By following these steps, we were able to create a functional program that introduced us to our flowers with their unique characteristics. With these skills in your toolbox, you will be able to create more complex programs and tackle new challenges in the world of programming.
Homework
Add a method called SeeFlower(), and when invoked, it displays the flower in ASCII art. If you want to see how I did it, the link to the source code is here. Goodluck and have some fun!